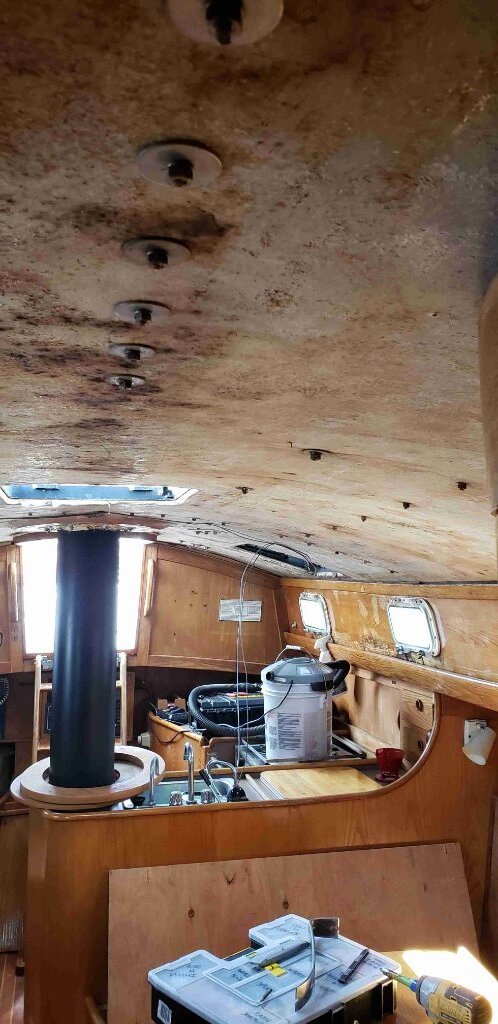
Well I figured I would submit my before/after projects. Starting with the removal of the headliner.
Saw your project, congratulations. I see you are in Alaska. I am on Gulf Coast of Texas but I think we may be thinking alike on one issue. That would be insulation. I am trying to put AC on my boat and the insulation would make the AC more efficient and also more comfortable. Have you thought about what to do there? If you don’t mind, please consider sharing your thoughts. Thanks, Charles.
Yes to insulation but as mention for different effects.
My last boat I pulled the headliner and insulated it. I utilized a few of the 6-pack of the 14" x 3’ stuff from Home Depot. Basically Styrofoam. It worked find and I am did so for control of cold and condensation. The original headline for this boat saw the dumpster and it wont be missed. I have a game plan yet there are a few other things I need to get done while I have it exposed.
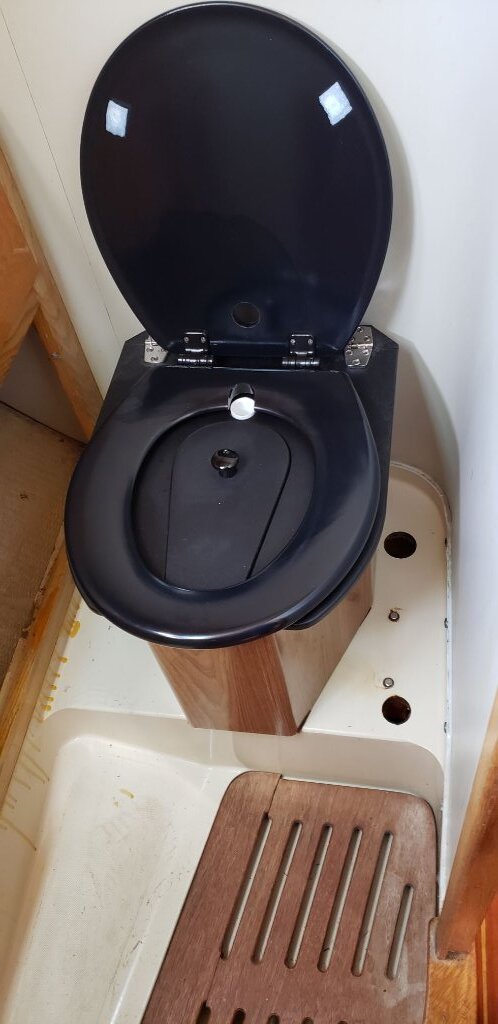
Right now it’s demo time to expose all the issues. Will have to rebuild some of the existing wood due to rot but not too big of deal - just time and saw dust. My neighbors in all the slips around me are all the same regarding mindset so we help each other out. The head, all supply/return lines and tank have been removed. I am a fan of Compositing Toilets so that is the route that I have gone.
I will post photos as I go. I am giving my self two years to get it back up and running. Mostly due to work, time and winter.
PS. We had to eat dinner in the RV because it got too hot here (73-F)… ![]() (I am originally from FL and was station in Panama and Egypt/Israel so I have become a wimp when it comes to heat…
(I am originally from FL and was station in Panama and Egypt/Israel so I have become a wimp when it comes to heat… ![]()
Compost toilet - still have to add the vent.
Ignor the runny stain/varnish… Arggg guess they never heard of blue painter tape…
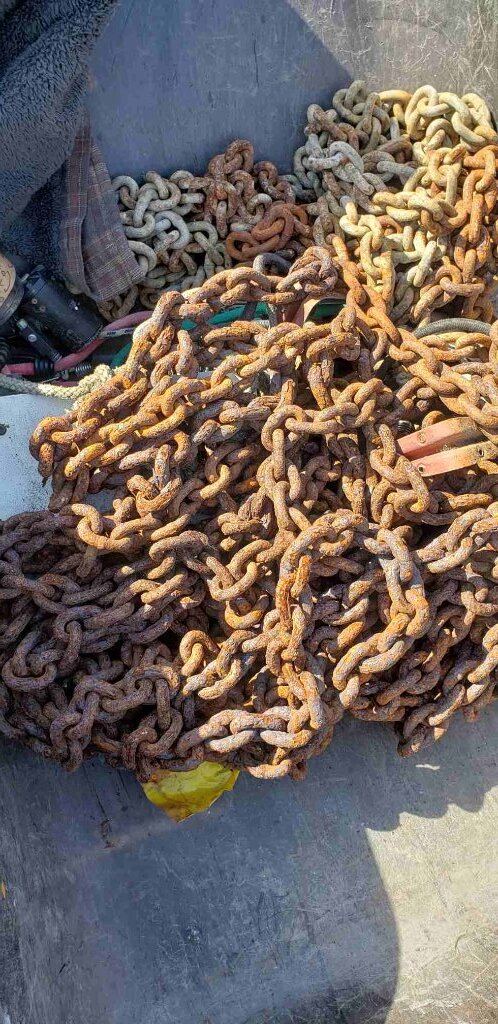
Anchor chain had rusted together as a large clump. Had to break it up with a hammer before pulling it out. (As I shake my head)
And no more holding tank - will become additional storage.

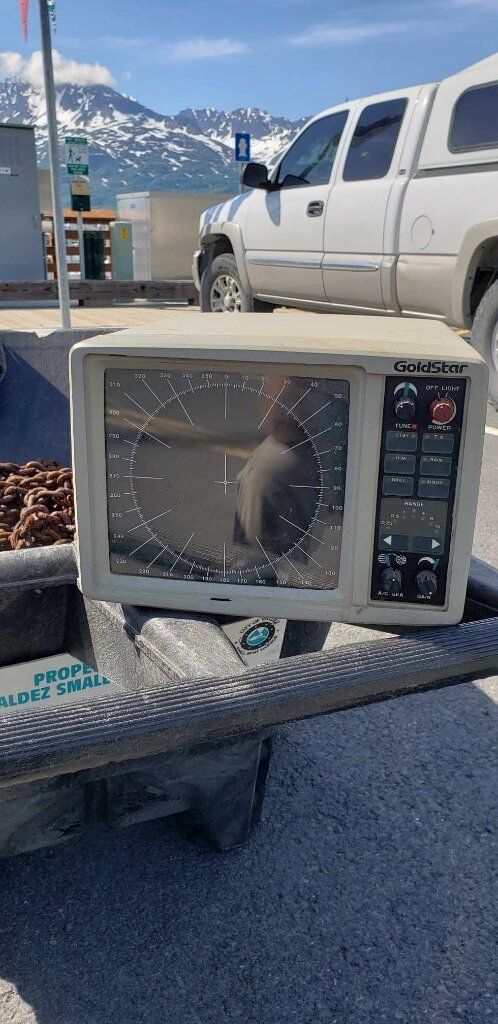
Bye bye relic, I mean radar… You don’t want to see the vintage VHF…
We’d very much appreciate details - what materials, etc. as you go and as to what works well and what didn’t. We need to replace all our headliner and I’m not looking forward to doing it for two major reasons - the mess (glue has dried and flakes everywhere) and working over my head. A friend redid his boat (and nice job) and told us to take down each section and use it as a template to make a thin plywood piece. Then he glued the headliner to that, and installed the whole piece. So he wasn’t working over his head to install the headliner, just to screw it in place. What technique do you think you’ll use? And how did you clean up the dried glue that flakes? Thanks for any help you can provide.
Sheila
s/v Full Monty Freedom 40/40 hull 34
Performed this task a decade ago on my Mull 32 (i.e. use the existing luan (1/8") as a template for new sections of luan. Glue new vinyl to same and remount. Still looks great, and no problems to date. The only recommendation I would make would be to directly glue vinyl to the replacement luan (and not use vinyl cloth with foam (typically 1/8") or add foam to same. The foam will not last, it will disintegrate – and you will be back to the same problem a number of years hence.
Once I get all the deck items sorted out I plan on the following:
- Drill out all of the screw holes that were put in place for the old headliner, bevel each one and fill with thicken epoxy/410. I was kinda shocked in the amount of screws.
- Remove ALL deck hardware, drill out each hole (Oversize), fill with thicken epoxy/410. Redrill and remount deck hardware. High stress areas I will use a better backing plate than fender washers. NO 5200 - all butyl tape.
- Epoxy in place wood furring strips. The spacing will be either 16 or 24 oc. In between I will place insulation which will be kept in place via tension. Last time I did this I used Cedar 2x2 for new tabs. It bends ok as long as you kerf one side. I also coated each tab completely with Epoxy and held in place with 1x2. Boy it was a pain in the arse to get around but after 24 hours I was able to remove the temporary bracing.
- I am looking a vinyl planking strips for the headliner (See Photo Example). This will be screwed to the new furring strip and those screws will be covered with new wood trim.
This will most likely happen either this coming winter or next summer. I will start pulling an item every other evening but work keeps getting into my free time ![]()
Last night I pulled ALL the running rigging, took it home and confirmed diameter and length. Will not order replacement yet until I figure out sail replacement via G-10 or original design.

Monty,
In regards to pulling. Well I have to be honest I was a bull in a china shop. Goggles, Respirator, Screw gun and went to it. Shop vac afterwards. Before all of that I basically had the boat empty of everything.
Post cleanup, following the visit with a shop vac was to wipe it all down.
Your explanations are very helpful, but I do have a few questions:
- What do you mean by the insulation is held in place by tension?
- What are the ‘tabs’ that you describe as 2 x 2? Having a hard time visualizing these.
Thanks and thanks for documenting this work.
Bob
S/V Windwalker, F44
Hi Bob,
By tension I mean a tight fit initially. The headliner will cover it up.
I will most likely epoxy 2x2 to the underside of the cabin top along with tabs. Kerf cuts to allow it to bend. The “tabbing” is basically the same you would do for a bulkhead or stringer. I will play with this as I get to that - will be down the road. The worse part of this is the prep work - I just love grinding fiberglass… May be an overkill but we shall see.
Yesterday I pulled the port cabintop winch, disassembled it and soaked it in mineral spirits overnight. (The photo is right before tear-down) This morning before work I I scrapped it down and have it drying. I also drilled out the existing holes with a 1/2 bit and filled the spaces with thicken epoxy.
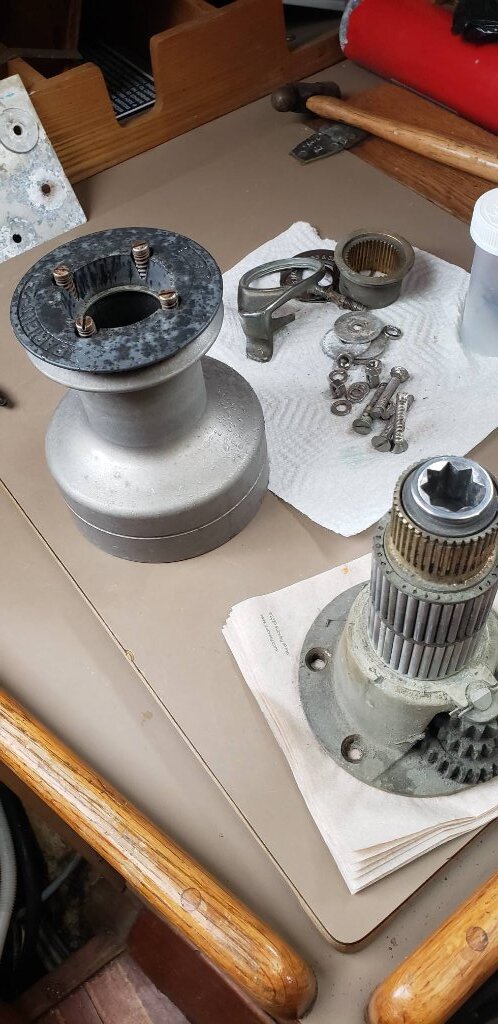
Pulled winches, soaked-clean and new grease. Drilled out oversized holes, filled with thicken epoxy and redrilled. Removed aluminum thin backer-bolts and replaced with new bolts plus thicker backer.
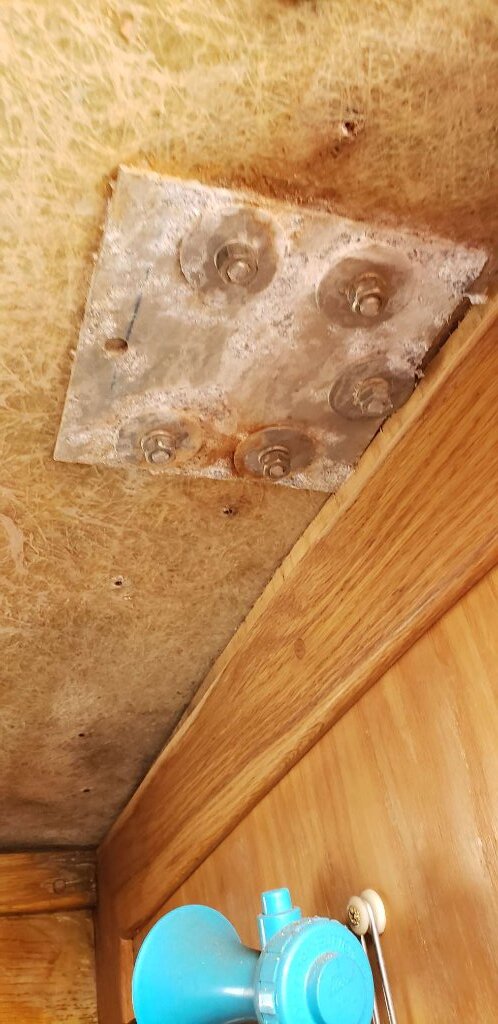
New backer
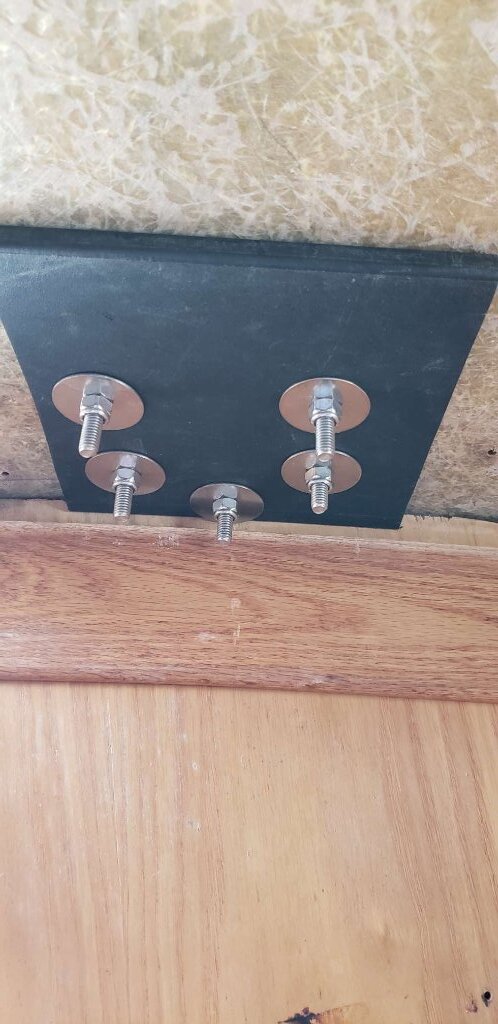
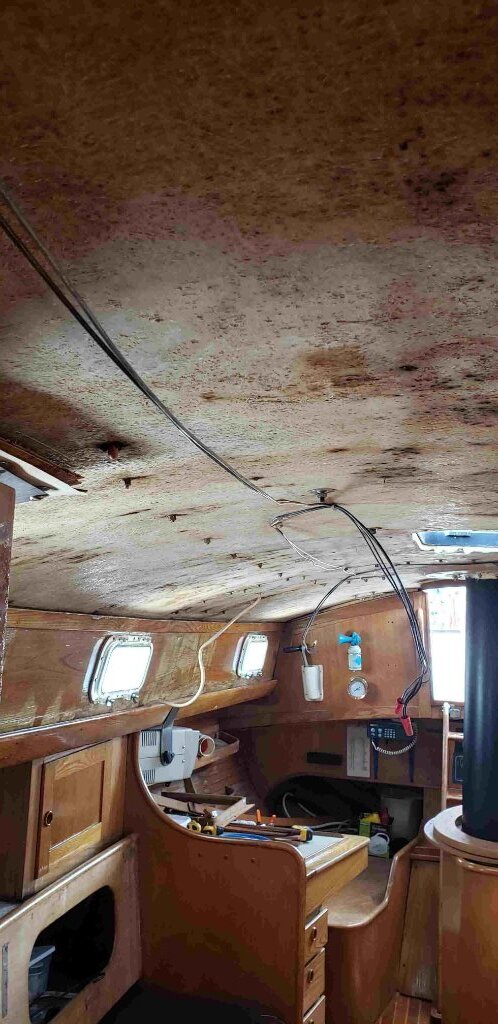
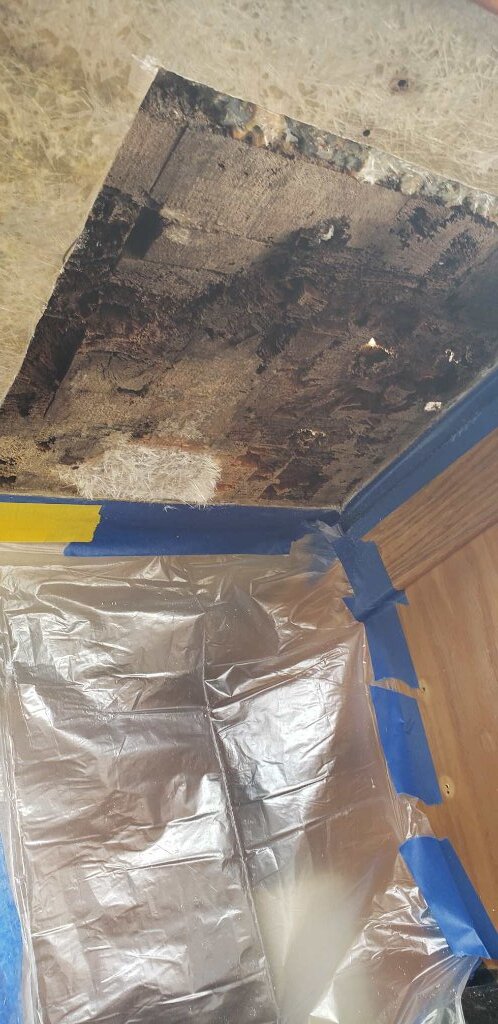
It started as a 8-in x 8-in square. It has now grown to a 2ft x 3ft area. Mush directly in the region of the winch and jammer. Not suprising given age of boat and the fact I live in a coastal rain forest.
Interesting note - directly above the trim location I have found a 3-inch section of thicken epoxy running midline to the cabin trunk. Must have leaked.
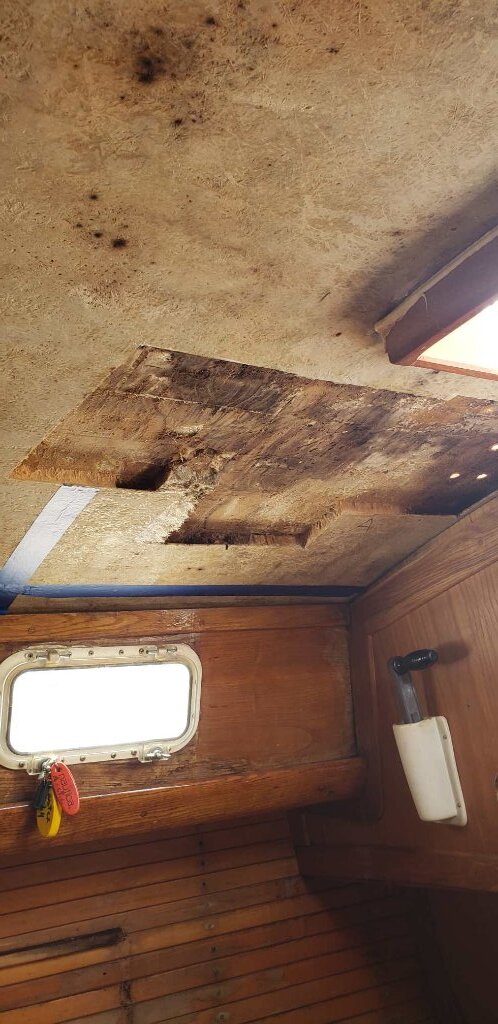
Next section for removal.
Oh the joys of living in Alaska. $53 for a 2x4 roll of Balsa Core. $73 for Shipping… Argggggggggg. I may just laminate plywood to get this done.
Don’t do it! Plywood sucks up just as much moisture, expands and rots just the same, albeit a little more slowly. I had the plywood in my old trimaran get totally wet and delaminate. Terrible. If you are going to avoid balsa and you might do so for good reason, order up some CoreCell or Klegecell. Coosa might do the trick really nicely. Make yourself a big list, order it all at once and have it shipped to a depot. Then, with a boat or a truck or whatever will do the trick, get it all back to your yard all at once!
All this work and you don’t want to be remembering the compromises you made!
Yea I know. (Plywood)… I will order it from West Marine and wait At least they have free shipping to Anchorage. If not then I will bite the bullet and have it shipped - it would eat me alive if I went with plywood.
I am fortunate enough that I know quite a few people that make the trip from Anchorage - just have to be patient. Its only a 12 hour drive to-fro.
Guess I will work on rewiring the boat while waiting - that’s if I get a day off.