Raw water pump rebuild completed

I am so tired of leaks! The word leak should be eliminated from the English language and replaced with “pain in the ass”.

Anyway, I had just completed replacing motor mounts and refit of the exhaust system with absolutely no leaks (after one or two false starts). I went up the SF Bay which required a good number of hours of motoring and found my engine well full of water. AARGH!

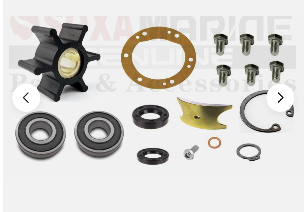
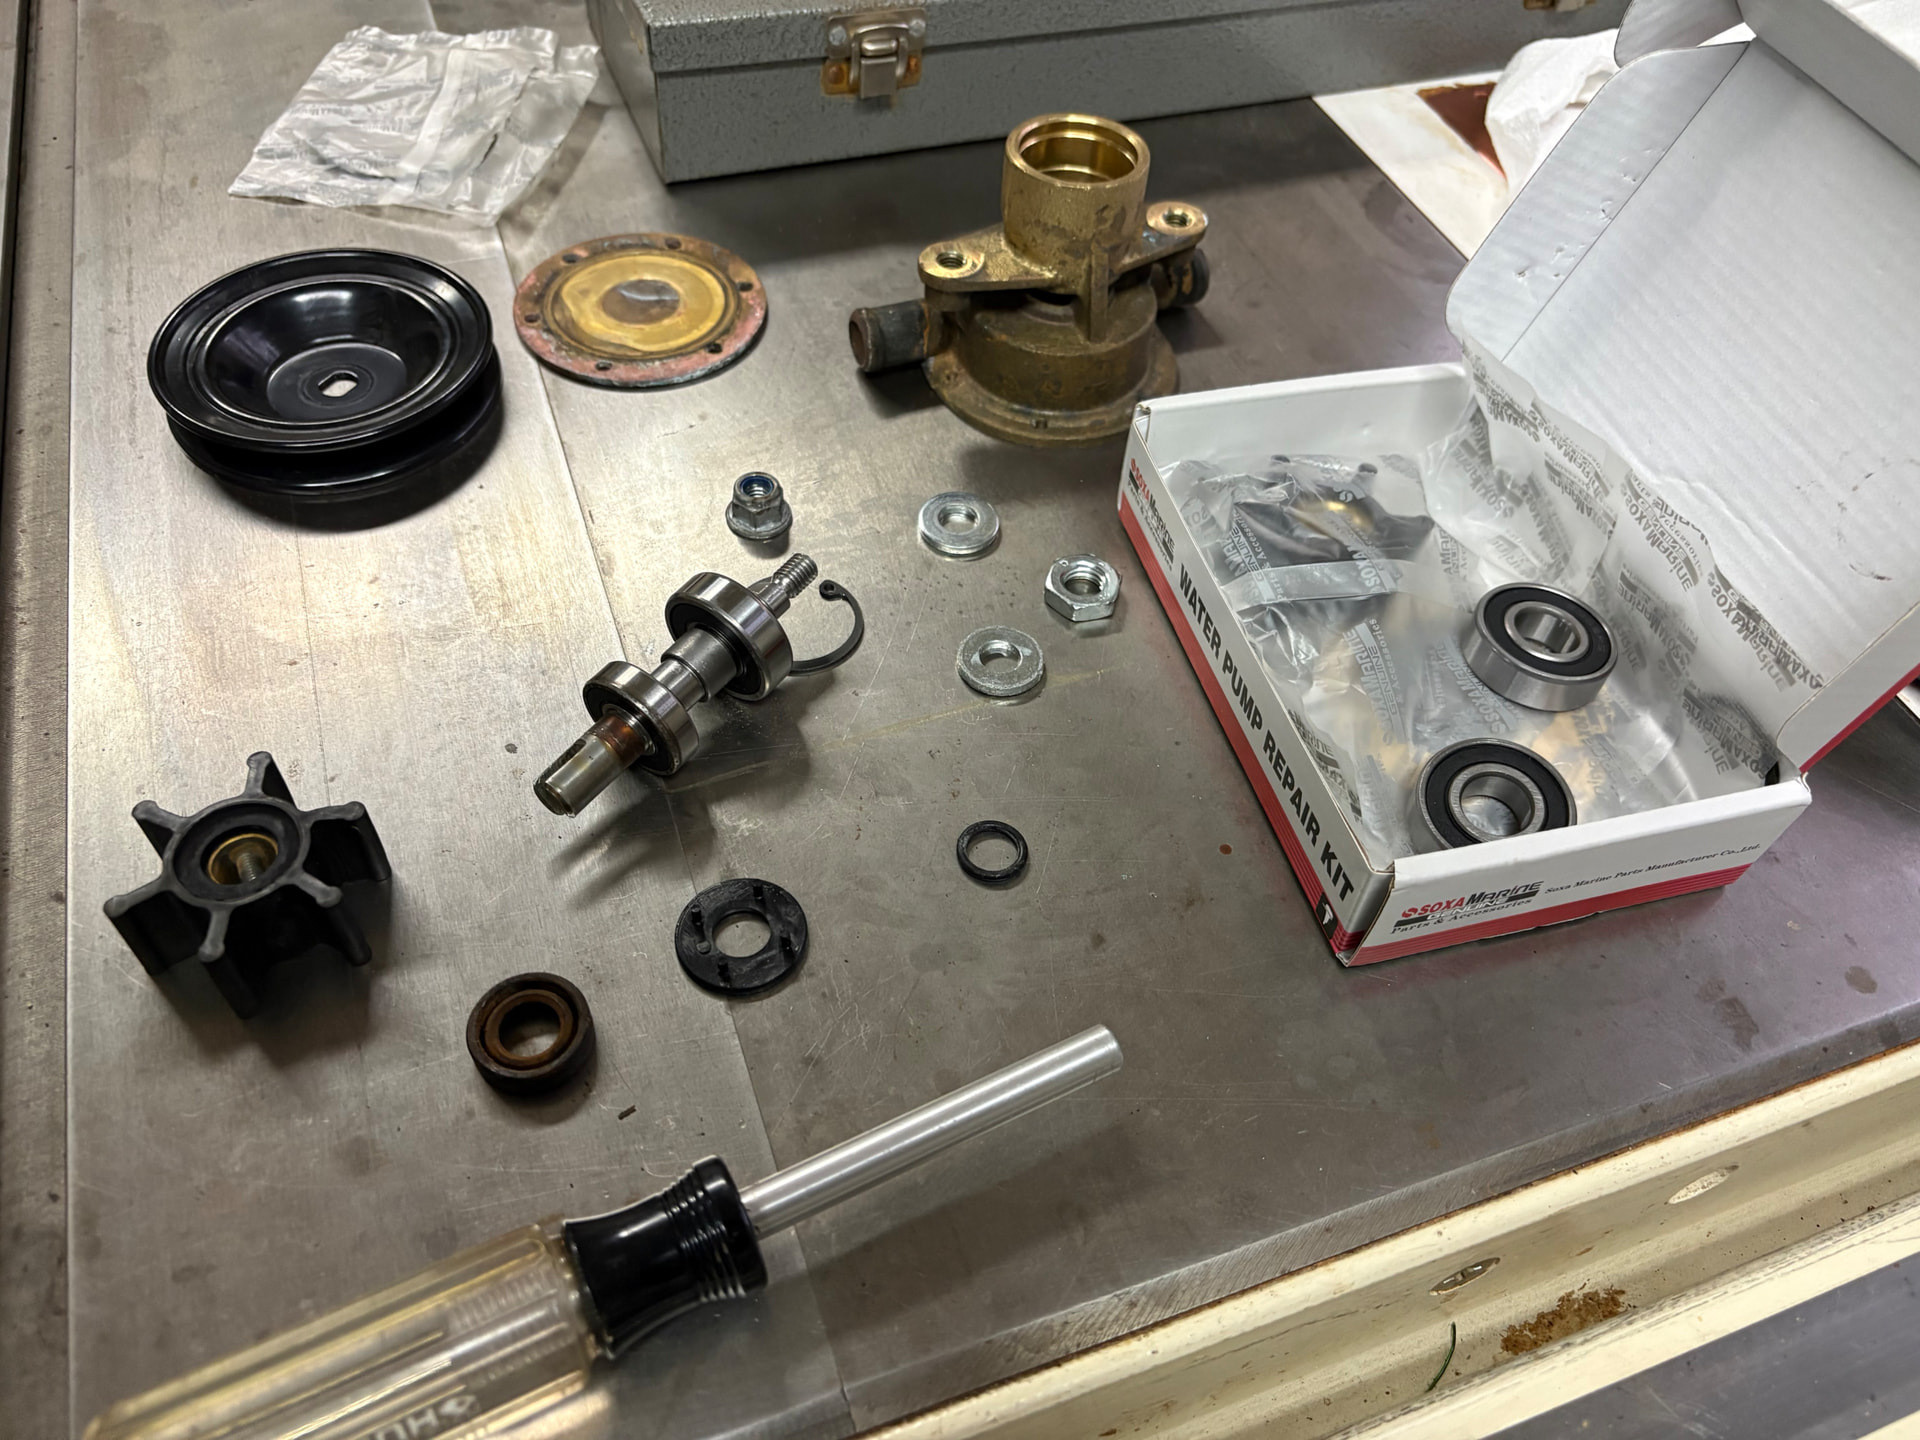
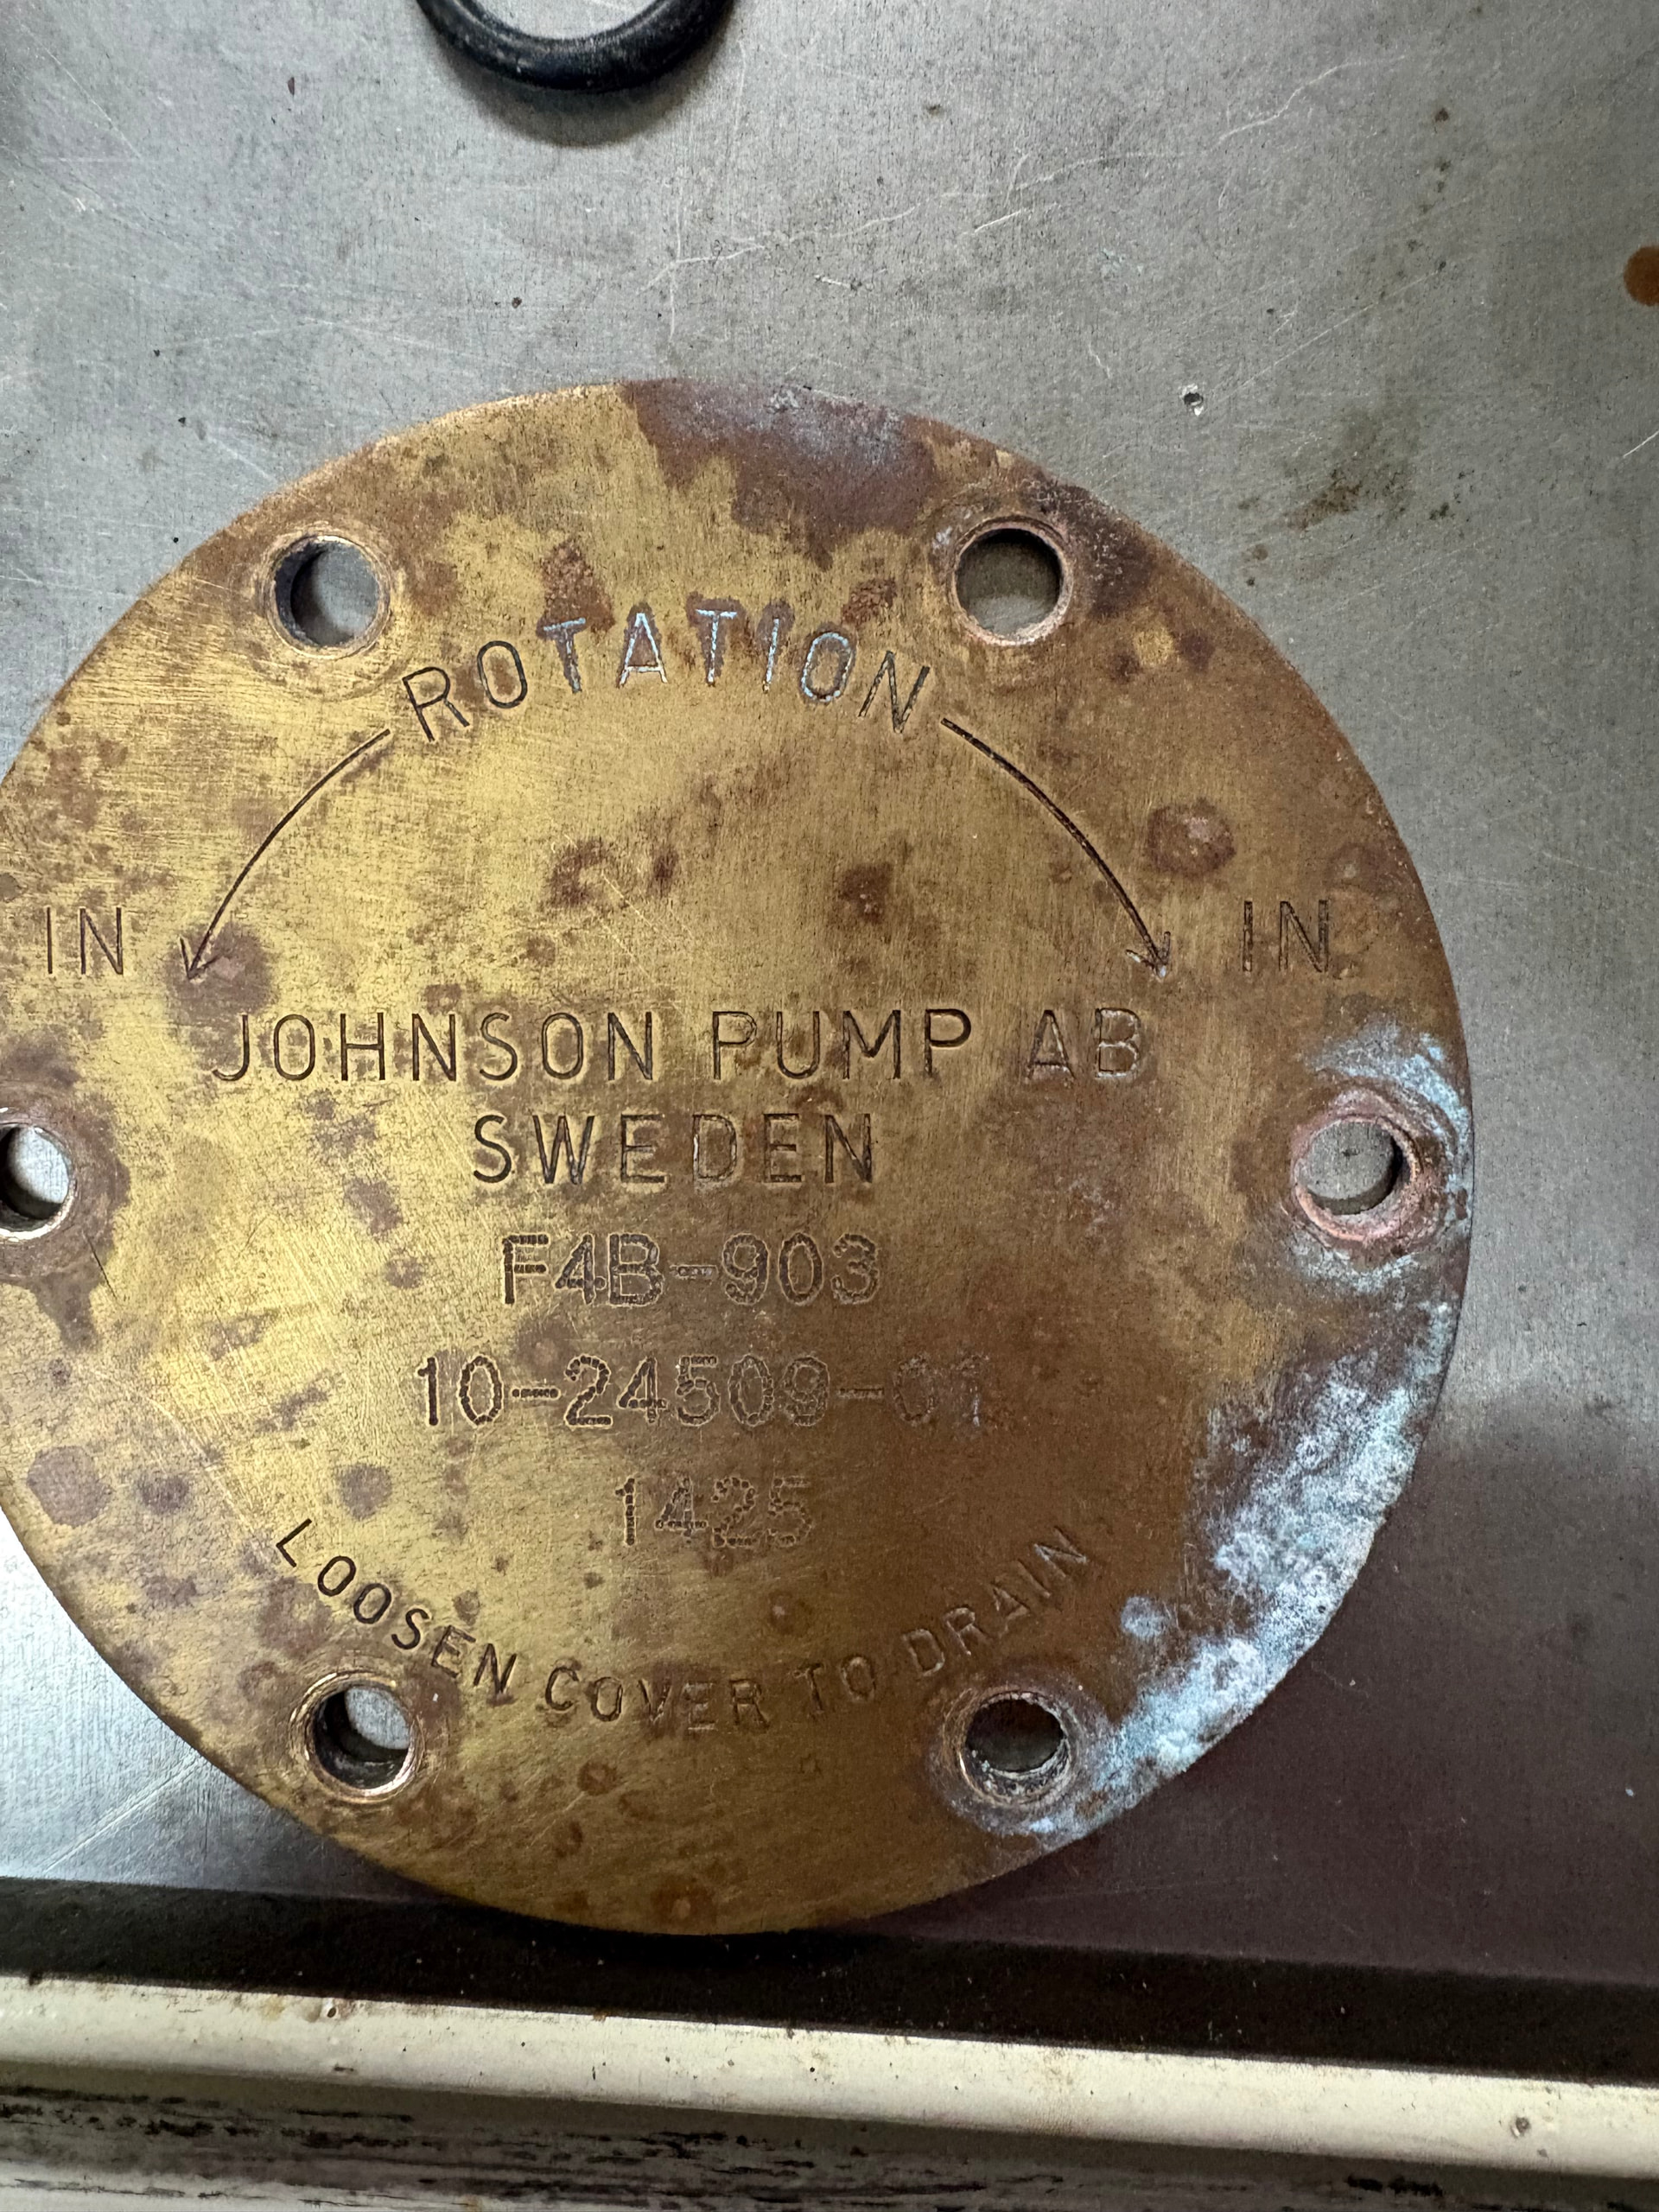
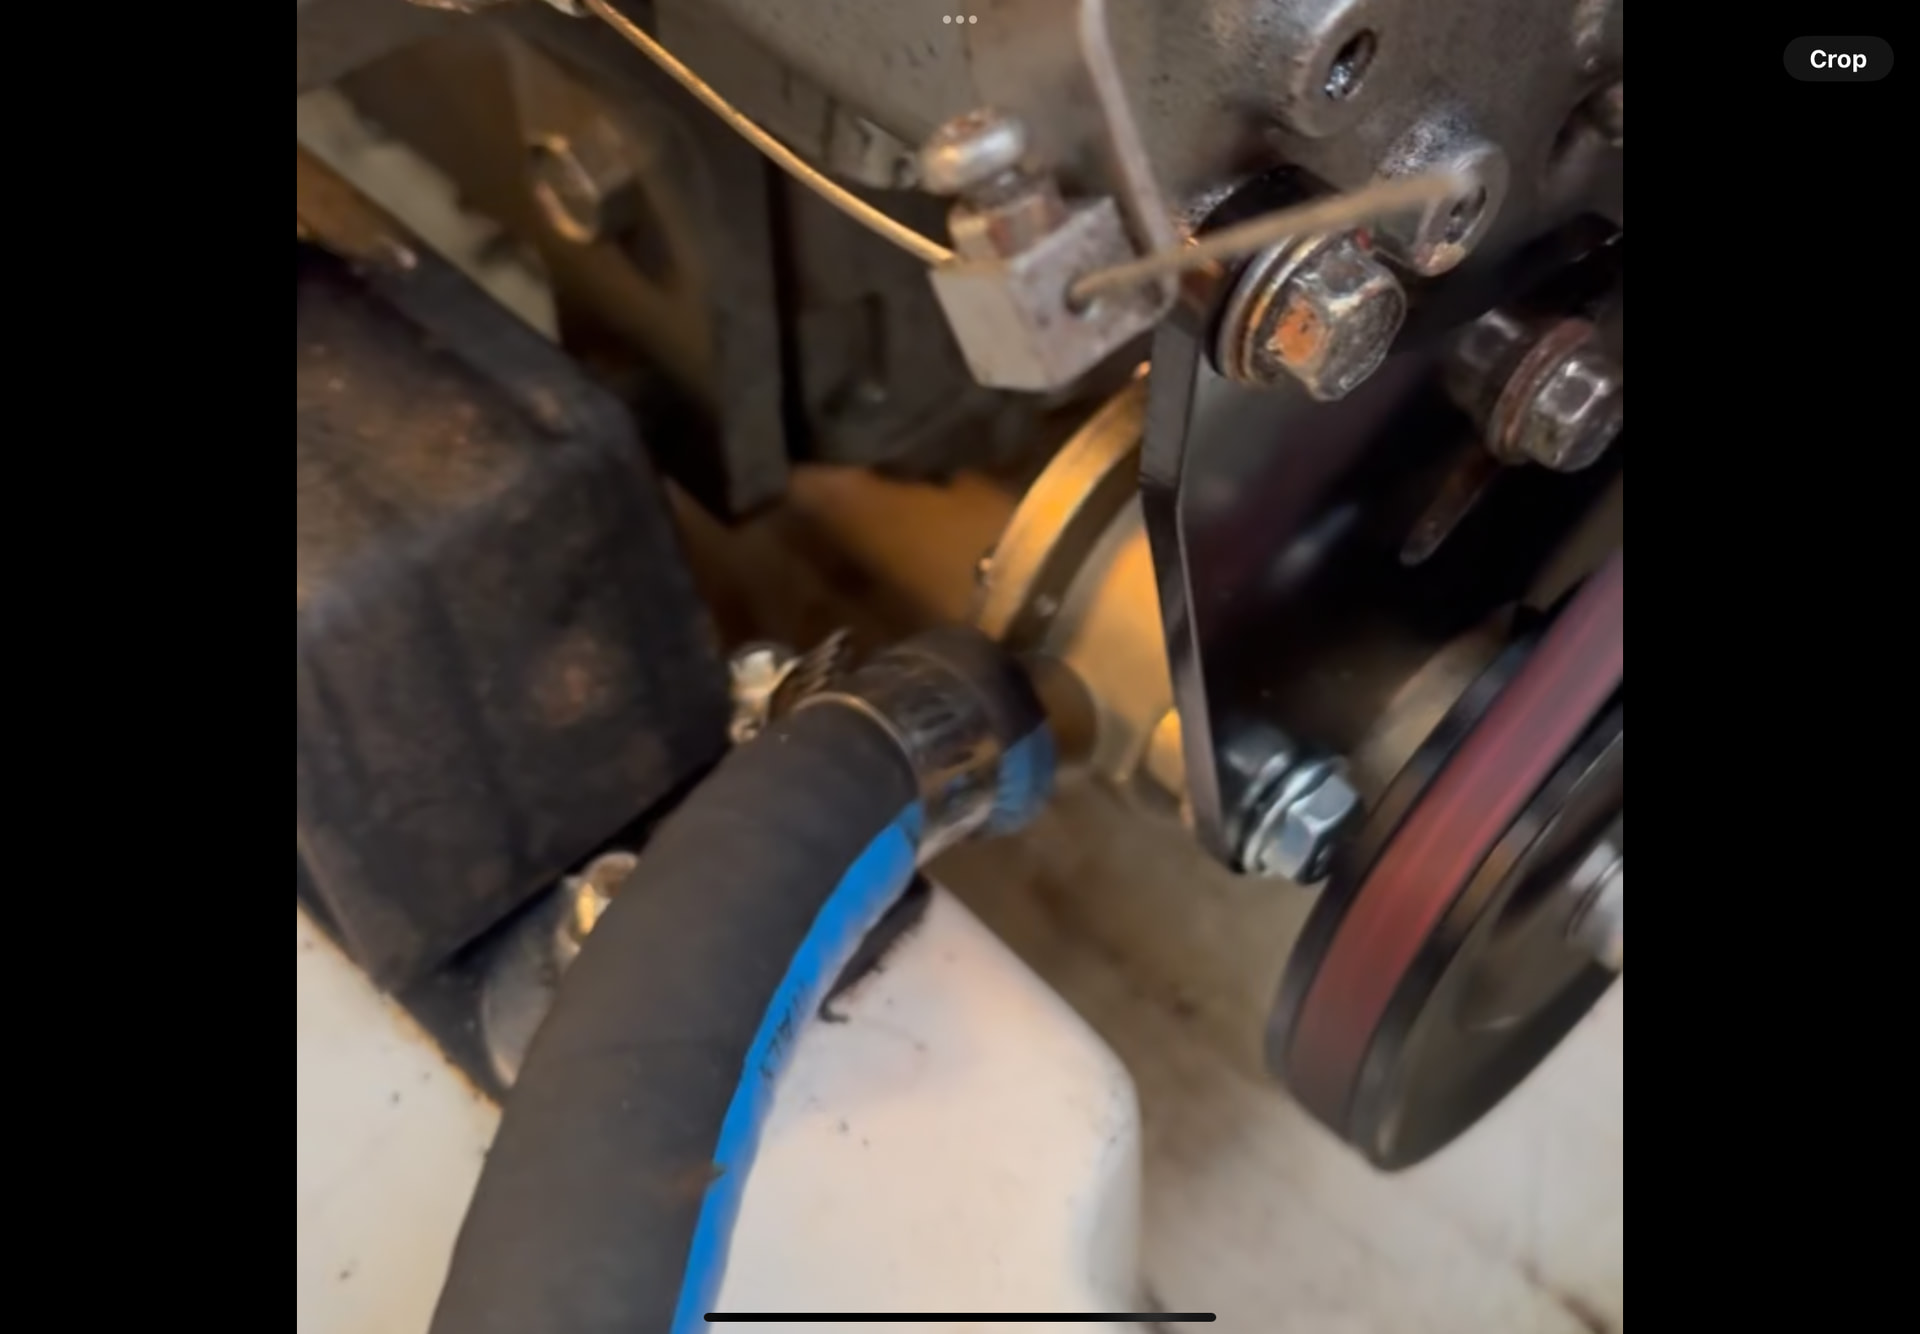
After some TS I found the Raw water pump was leaking. I thought this would be easy. it is probably the input or output hose. Nope, it looked like it was coming from the cam screw at the bottom of the pump. Tore everything apart and, as a bonus, found a trashed impeller (shame on me) and a very badly worn cam. So I bought a rebuild kit which included the cam, screw , screw gasket and impeller, the rest of the rebuild parts would go in my spares kit.

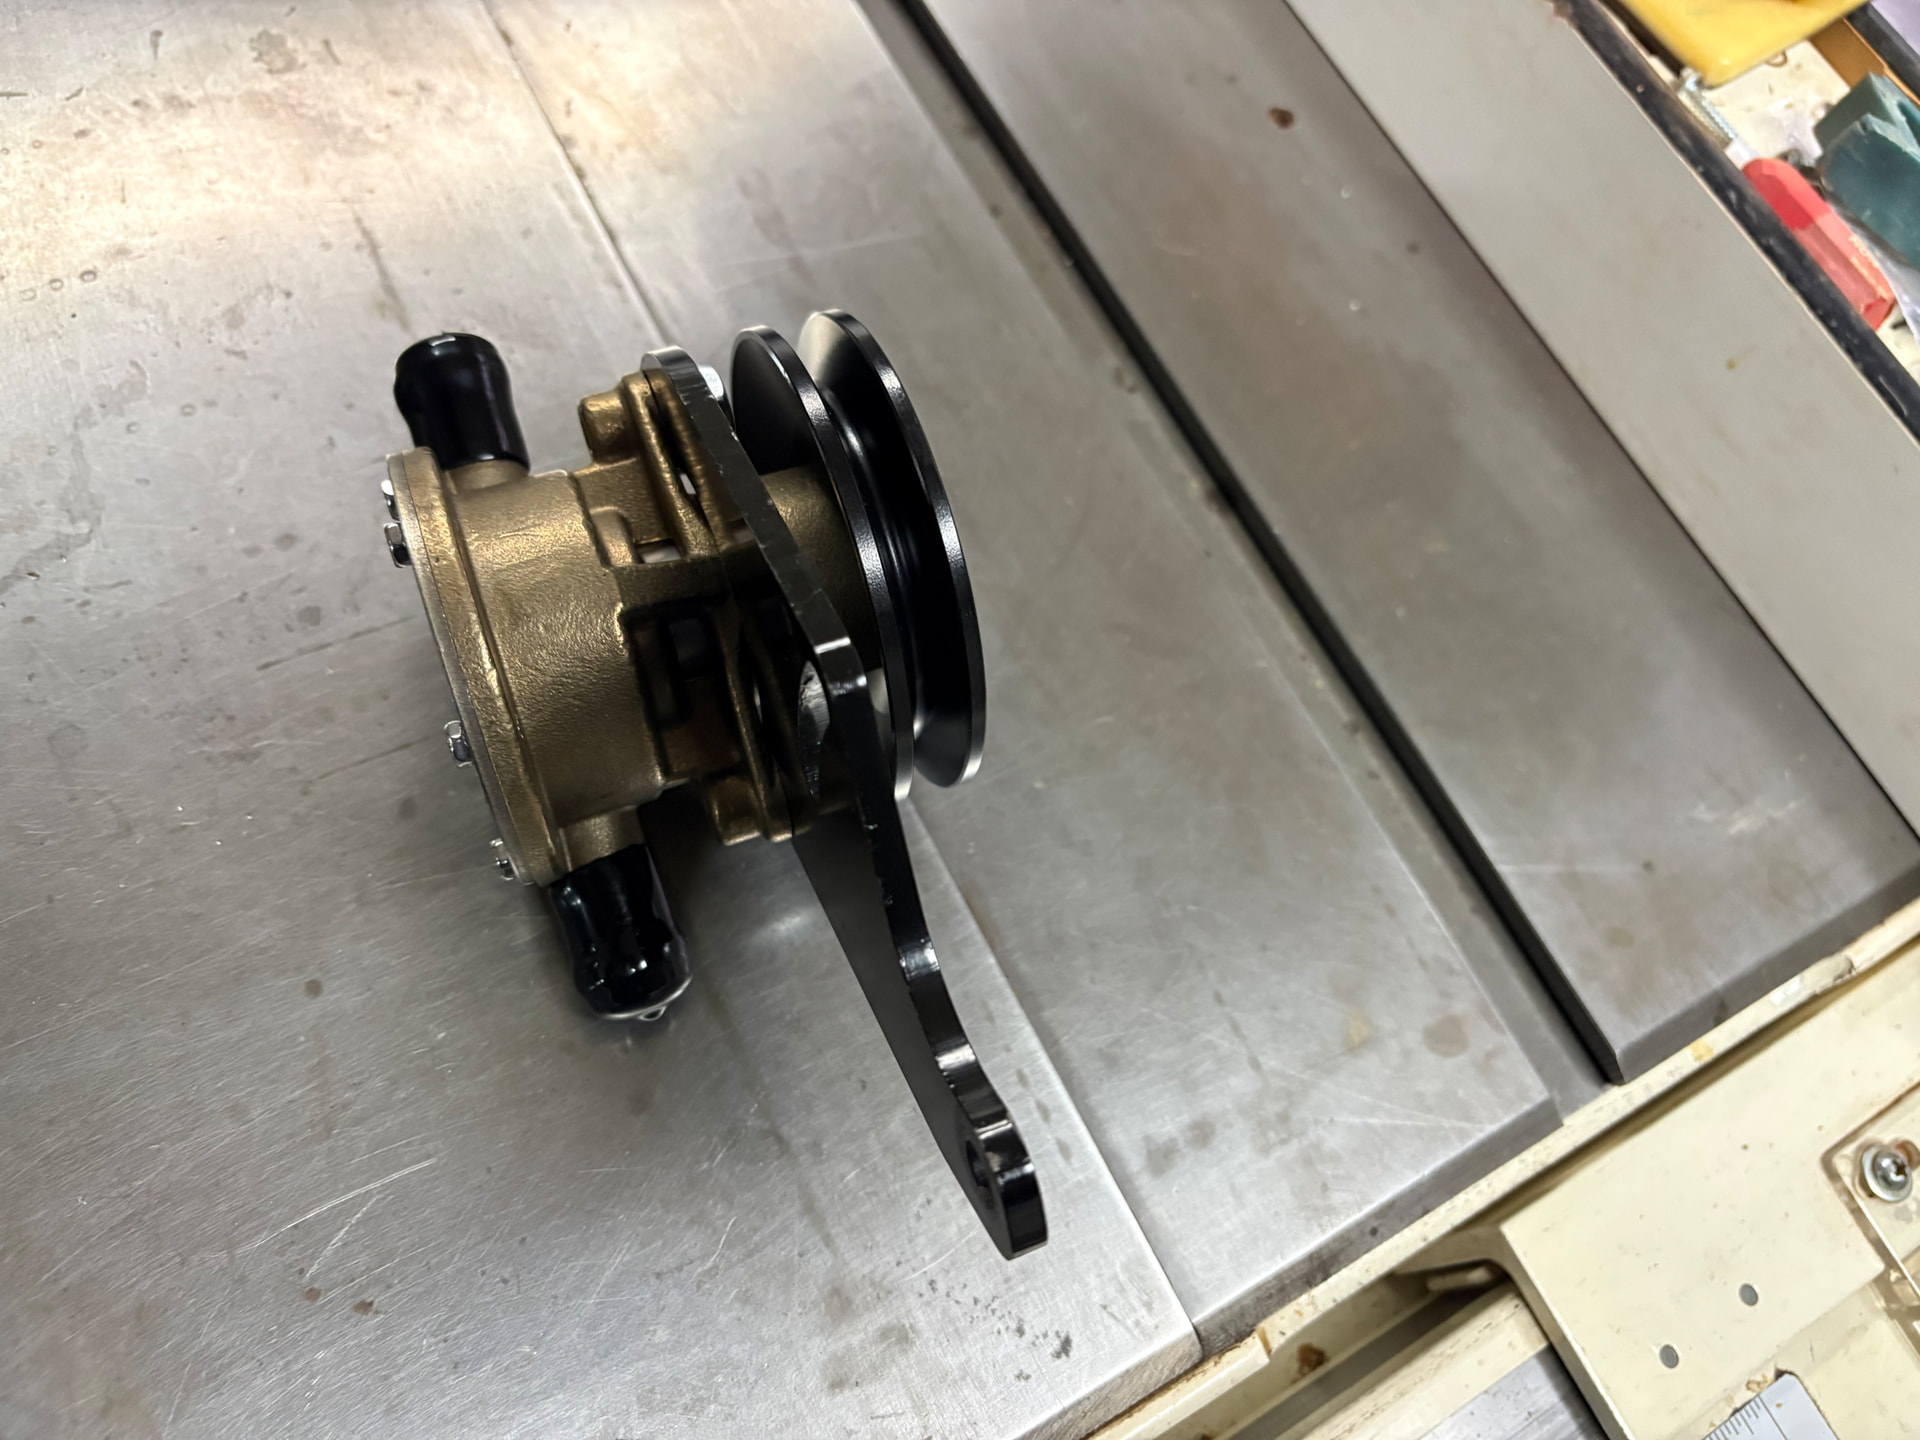
Got this completed, re-installed the pump and the leak was worse.

WONDERFUL!! now what?

So I started the engine, got out my flashlight and started looking for the leak for the third time. It turns out it was coming from a weep hole in the pump body. What the heck is that for? I never knew that hole existed. It turns out this weep hole is behind a lip seal (called the oil seal for some reason) and a large rubber “water seal” and before the pump bearings. I assume this is designed to protect the bearings if the seals go bad. Water leaks out vs flooding the bearing cavity.

Anyway, pulled the pump out - again - and started a full rebuild using the kit which I had, fortuitously, already bought. It took some work to get the bearings off the shaft and to get the shaft Assembly back into the housing but, amazingly, it all came together and passed the leak test.

Just a heads up, if you have a mysterious leak from the raw water pump be sure to check this weep hole. If the pump has not been rebuilt for a long time, those seals are likely toast. Mine had at least 26 years on it. Amazing it lasted that long.

Another interesting note on this. The lip seal noted above is exactly the same design as the lip seal used in my Lasdrop shaft seal. The pump seal is smaller diameter but looks identical, it does have an integrated housing seated in the pump body unlike the Lasdrop where one can pull out only the lip seal itself.

Mike would you be able to post any pics

I only have a “still life” photo which is below and portrays just about every tool I own ( along with my Wife’s weighted exercise bracelets :rofl:)

I did think about taking photos or a video but I took so many wrong steps, trying to document it was just too tedious.

However, I can certainly walk you through what I did. I will skip the fifty oopses I encountered.

1 Like

Great, I bought the eBay repair kit. Just in case! I’ll check mine again tomorrow- it’s not leaking so far but good to have for the future. How did you remove and replace the bearings!

I removed the pulley by locking the pulley itself in a vice (not so much pressure you bend the pulley!) removed the nut holding it on the shaft and put the parts aside. The impeller and the cam were also removed at this point.

then I removed the large c clip at the pulley end of the body to allow the bearing set to be removed. You will see this when the pulley comes off.

I then placed the body of the pump on my vice with the jaws opened to match the pump body sides (but clear of the bearings) with impeller cavity facing up.

I then took a small wood block to provide cushion for a hammer which I used to pound the shaft and lower bearing out of the body. This leaves the upper bearing and a thin metal “bearing cover” in the body. the lip seal and rubber seal just below the impeller cavity also remain in the body at this step.

I then used my hammer and a socket extension bar to pound out the upper bearing. I was not concerned about damaging the upper bearing because it it was badly corroded and ready for the trash anyway. The bearing cover got a little dented but that was not serious and I reused it.

This left me with the shaft out with the small c clip and the lower bearing still on the shaft.

I removed the c clip and used the wood block and vice method to pound the shaft through the lower bearing to release it and threw that bearing away too.

Then I installed a new small clip and used the “soft pounding” method to get the bearings back onto the shaft. I did one from the top and one from the bottom so both bearings were flush to the clip. Then I re- installed the bearing cover over the exposed face of the bearing which was on the impeller cavity side of the shaft.

I struggled with the removal of the lip seal which had a metal case (new one is nylon or some plastic material) it was really trashed along with the “water seal” washer and that is where the leak was coming from. I finally got it out and cleaned up. The new parts install fairly easily, you just need to seat them properly and, obviously, these have to go back in before you re-install the bearing/shaft package.

At this point it is fairly straightforward. You use the hammer/block to pound the shaft/bearings back into the body with the impeller end going through the new washer and lip seal as you get the shaft seated fully.

Re attach the big c clip to secure the assembly in the body, re-install the pulley, get your new cam and impeller and cover installed and you are ready for test.

It is very helpful to have a disassembly drawing of the pump by your side so you don’t miss anything. I have a maintenance manual but dwgs are available online too. Also make sure you got the right drawing for your pump. There are several pumps which are very similar in terms of their construction.

Mike - did your kit include a spacer ( goes between the two bearing). My kit in pic doesn’t show a spacer I think….

Looks like you have same kit as me. The small c clip is the “spacer” in my pump but I did note there are different shaft configurations. I think the only way to know for sure may be to disassemble the pump… But… Look at the impeller end of the shaft. If you have an h shaped opening for a key that is a spacer version if you have a small key stuck into the shaft that is the c clip spacer shaft…at least I think that is the case.

The other thing I noted. Forgot to mention this, is the cam screw delivered in the kit is too short. I solved this by purchasing a longer, I think 1/2 inch screw at Ace HW. Oddly it turned out to be standard screw vs metric. I spent a half hour searching the metric dept before I figured this out :joy:

I also used some antisieze on that screw because neither the kit or ace provided a bronze screw.

Took a while but new pump is almost there. Although my raw water intake pump was not leaking I decided to get a re-build and update parts as my boat is 25 yrs old. I bought the rebuild kit on eBay and removed my original Johnson pump. At the boat I was able to remove the shaft with the bearings, remove the large c-ring at the pulley end, and remove a pesky nut under the pulley not seen on Mike’s pump ( this thing was reverse threaded and it took some time to figure that out grr). I could not remove the 2 bearings from the shaft so brought the whole thing home to finish up. I’m slow on the uptake and noticed that my new kit bearings were much larger than the bearings in the shaft. I had one smaller bearings and one larger bearings ( but still smaller than the 2 bearings in the kit. Huh? So what else- I bought a new complete pump minus the mounting plate. Added my mounting plate to the new pump and there you have it. Notice that my old shaft had a spacer between the bearings. Don’t know how the new pump is configured! Tomorrow I’ll re-mount it to the boat.

Wanted to give an update on the maintenance kit I bought- I looked for a kit with the same pump numb and engine model and what I bought was obviously different When I bought the whole pump I looked for the pump number 10-24509-01 (see pic) The new pump said it was a replacement for that part….

1 Like

One important thing to remember about these pumps: the belt that drives the raw water pump should be loose, not tightened down like the V-belt. It’s just pumping a small stream of water, so there’s no need for perfect energy transfer at high RPMs. It should be loose enough that it flops around a bit when running. Over-tensioning of the belt puts unnecessary strain on the seals and bearings, and leads to their premature failure.

:partying_face: Congrats, Mike, on a Leak-Free Victory!

Mike, that story about the raw water pump is absolutely epic! Talk about a pain in the ass saga that you conquered through sheer persistence and excellent troubleshooting.

Going from a full engine well to successfully identifying the mysterious weep hole leak, tearing down the pump multiple times, and executing a full rebuild—that takes serious dedication.

You didn’t just fix a leak; you performed an engine room intervention, upgraded your spares kit, and gained the deep, intimate knowledge of a 26-year-old raw water pump!

Huge props for finding the root cause and getting that system back to 100%. Enjoy the peace of mind that comes with a perfectly sealed pump (and thanks for the tip on the weep hole—you’ve probably saved a few other people some grief!).

Mission Accomplished! :hammer_and_wrench::anchor:

That’s a classic boat maintenance maneuver: planning a rebuild, running into a parts mystery, and realizing a new assembly is the best use of your time! Sometimes, the cleanest solution is the straight replacement.

You dodged a bullet there—the fact that your kit bearings didn’t match the bearings on your 25-year-old shaft assembly (especially that confusing spacer setup) is a perfect reason to swap the whole pump. Dealing with reverse-threaded nuts and stuck bearings is enough of a pain in the ass without the added headache of non-matching parts!

Great call on getting the complete new pump body and adding your old mounting plate. You’ve now got a zero-hours pump, which is fantastic peace of mind for the next decade or two.

Good luck with the final re-mount tomorrow! You’ll be back on the water with full confidence in your cooling system.

All good - no drips.

1 Like

Where are you sailing to this Christmas?:blush:

No that you have got everything fixed

Ha, on the boat now with the diesel heater on (another one on Mike’s great ideas). On lowest setting and quite toasty:)… and drawing minimal current…! I would love a group sail in the bay or out with Freedom people. Winter sees bay sails often (weekly).

1 Like

“now that you have everything fixed”

Barbara, now that is some wishful thinking I must say :rofl:

1 Like

yes mike, the biggest headaches are gone, which is a massive win. :grinning_face:

I don’t want to sit my ass one place, I would want to tour around, the Yacht is fixed :smiling_face:

I think a boat is finally fixed when you sell it! :rofl:

1 Like

Do you want to sell the boat?

Of course not Having too much fun working on her and sailing her

Very nice work on your raw water pump, nice to not have to worry about that anymore!

This winter I’m doing a full top end rebuild on the 1987 2GM20F in my Mull-28. I’m removing everything I can including the cylinder head so I can inspect/refurbish/repaint as needed at home, then I’ll reassemble when things warm up here (MA) in the spring. Some of my experiences so far:

  • The engine is amazing shape for something almost 40 years old that has received diligent fuel and oil maintenance, but no other major work. Very little carbon buildup in the head and the cooling system, including the heat exchanger, has virtually no deposits. True, the exhaust mixing elbow needed to be replaced, but I’m sure that it is the original so even that survived long past its expected lifetime.
  • I was told many times that it wasn’t worth trying to keep these old Yanmars running because parts are too hard to find. That has not been my experience at all. I have ordered dozens of parts and not only have they all been available, every one has been in stock. And relative to the other old vehicles that I am fond of maintaining, I really don’t find the parts pricing unreasonable.
  • The Yanmar shop manual is a remarkably useful document. Highly recommended, along with the parts diagrams that can be found online.

My experience might not be typical, but I think more sailors should consider keeping these GM “gems” alive vs. jumping to a repower. Yanmar made a remarkable engine in my opinion.