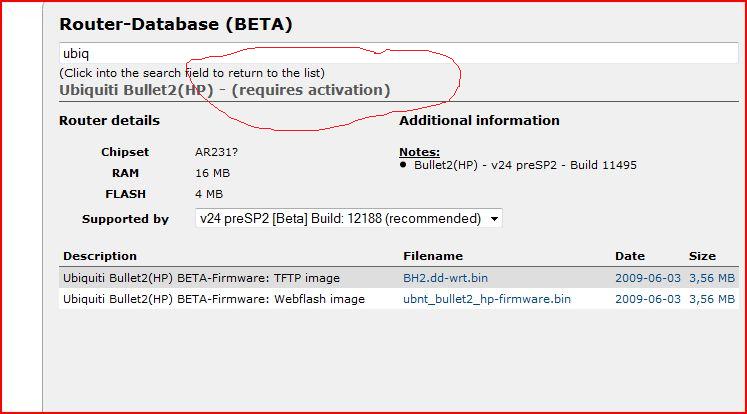
One of the most common upgrade that I’ve done on BlueJacket is to the WiFi Internet system. I’ll admit it: I’m an ex-Internet guy and love my access. Finding the right solution has involved a lot of trial and error. My latest (successful) attempt utilizes an Ubiquiti Bullet2-HP 800 mW access point. You can find details on it here: http://www.ubnt.com/products/bullet.php. Here’s a photo of the device:

The device is about 6" long and threads directly onto an external antenna. This is key as you get a lot of signal loss when you use a cable to attach the antenna to the device. The installation that preceded this one utilized the same antenna and a 12’ LMR-400 cable connected to an Alfa wireless USB adapter, but I can see far more access points using this setup. Another issue is that the LMR-400 cable is very thick, making it hard to run. Data connectivity and power to the Bullet is supplied via cat-5 Ethernet with power-over-ethernet (POE).
I’ve been using a 9dB 2.4GHz omni-directional antenna with great success. Here’s a link to the antenna that I use: http://www.wlanparts.com/product/OD24-9/OD249_9dBi_24GHz_Omni_Antenna.html Here’s what my setup looks like:

Basically all that you do is connect the Bullet to the antenna, connect an Ethernet cable with POE to it, plug the Ethernet cable into your PC, configure the Bullet and you’re ready to go!
I will say that figuring out how to configure the Bullet was a bit confusing. The device doesn’t come with any manuals, so you have to find the information on-line. Unfortunately, it’s less than obvious where to start. After a bit of searching I did find the following article which answered most of my questions: http://www.ubnt.com/downloads/Nano_Quick_Set-up.pdf Note that it’s titled “Beginners Setup Guide for Nanostation 2”, but it also applies to the Bullet.
Once you’ve configured it using the above instructions, the Bullet is acting as a router. You connect to it via your web browser (192.168.10.20 if configured as described) and then you can view the status and/or select an access point. When you connect to it, you’ll see following main screen which contains status information:

In this case I’m connected to an access point (AP) named “Beacon WiFi Network AP2” and have a great signal (-22 dB). If you were to look at the actual Bullet device, you’d see the LEDs on it that are lit up with the color coding shown next to the Signal Strength. You can also see the AP MAC address (which would be all zeros if you didn’t associate with the AP) as well as the IP address that was assigned (10.0.2.153 in this case). Another thing to note is that if you associated with an AP but it didn’t assign an IP address, the LAN IP Address will be the same as the WLAN IP Address.
To select an access point, you click on the “Links” tab, which displays the following screen:

If you want to select a new access point, click on the “Select” button. You’ll then be presented with a screen showing available access points, their signal strength, encryption, etc. Here’s an example showing the access points sorted by decreasing signal strength:

Check-mark the access point that you want to connect to and then press “Select”, which will bring you back to the Links screen. Update any security information, press “Change” at the bottom of the screen and then “Apply changes”. You can then navigate back to the Main tab to view your connection status.
All in all this has been one of the best WiFi devices that I’ve tried. It’s very reasonable priced at around $80 plus a POE injector (which is cheap). You’ll also need an antenna, which will run about $45 plus a mounting bracket. So, for less than $150 you can have a very powerful, easy to configure WiFi system. Note that I tend to buy my equipment from http://www.wlanparts.com/, but these parts are sold by many vendors. Just find one who you feel comfortable working with.
– Geoff